Online Shop / Britmet Liteslate - Pack of 22 ( 1 Square Meter )
Britmet Liteslate - Pack of 22 ( 1 Square Meter ) (Pack size 1)
Add To Basket
From £57.20
(From £68.64 inc
VAT)
Full Description
Liteslate Overview
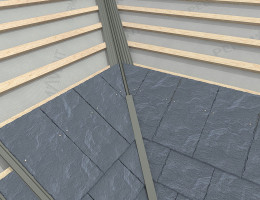
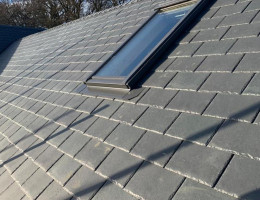
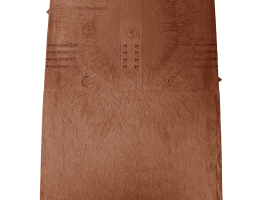
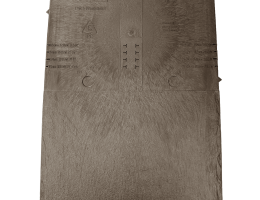
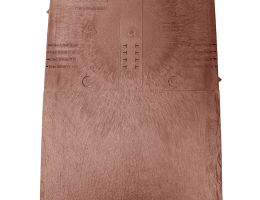
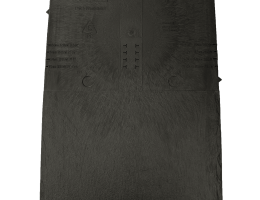
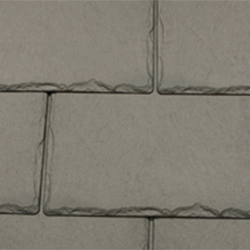
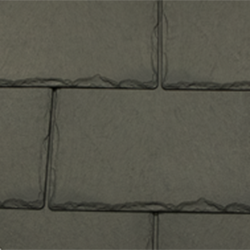
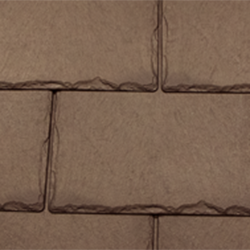
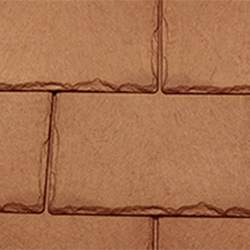
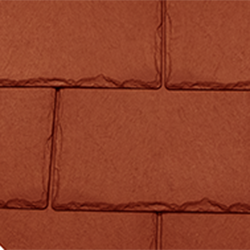
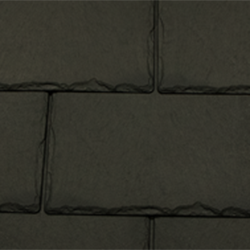
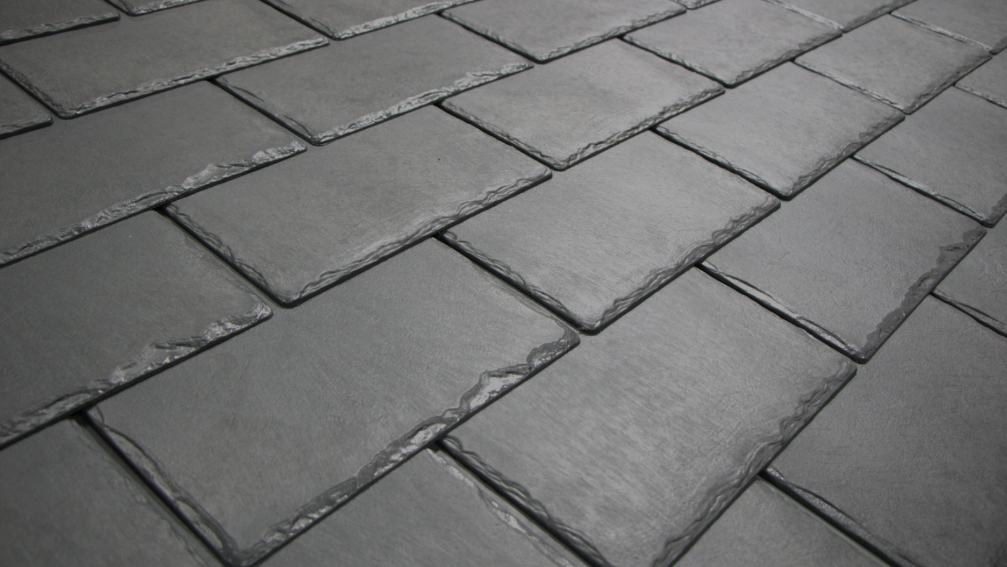
Introduced to the market in May 2019, Britmet's Liteslate is our innovative synthetic slate roofing tile made from 90% recycled polymers with all the characteristics you can expect from a traditional slate tile. Liteslate offers an authentic finish with riven edges, traditional colour choices and impeccable durability.
During the design process, real welsh slate was used in order to perfect the aesthetics and performance qualities of the LiteSlate. However, unlike natural slate, as a synthetic slate roofing tile, Liteslate won’t crack, break, chip or delaminate due to its ground-breaking design and cutting-edge manufacturing process. Furthermore, the LiteSlate is designed with the environment in mind. Over 90% of the Polymers that LiteSlate is made from are recycled. In 2021, Britmet will recycle over three million kilograms of polypropylene during the manufacturing process.
In summer 2019, the LiteSlate passed its fire testing with a BS476-3 Fire Rating and new mould designs started development due to increasing customer demand for the composite slate. We have 7 production lines manufacturing the Liteslate ensuring that 14 slates are made every 45 seconds to supply our customer demand.
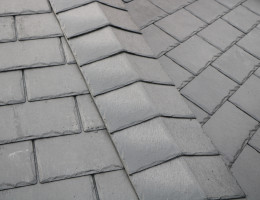
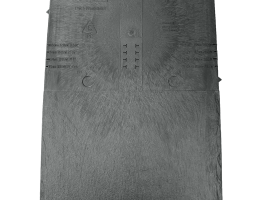
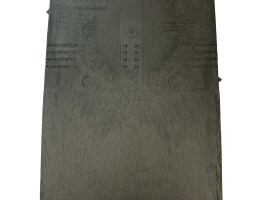
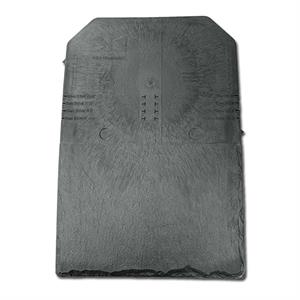
As our Liteslate is compression moulded, it has detailed impressions displaying where to fix the slate making it even easier for DIY installation. It is also easy to cut as you only require a sharp, fine-tooth saw or sharp blade.
Download the installation guide here

Liteslate Technical Spec
| Min. pitch: | 14° |
| Max. pitch: | 90° |
| Overall width: | 297mm |
| Overall height: | 445mm |
| Batten gauge: | 152mm-191mm |
| Roof cover per plate: | 0.06sqm |
| Slate per sqm: | 18-22 |
| Weight as laid per sqm: | 12kg |
| Ridge: | 5.5 per linear metre |
| Hip: | 5.5 to 6.5 per linear metre |
| Material: | Recyclable blend of Polypropylene & Limestone |
| Fire resistance: | BS476 part 3 |
Liteslate General Specification
Handling and Storage: Slates need to be stored on the original pallet on a flat surface. Proper storage of the product at the job site is important. The slates are cambered to ensure that maximum pressure is transferred to the leading edge of the slate during installation. Do not double stack pallets. LiteSlate should not be stored on roof decks in such a manner as to over-stress and/or damage the deck and supporting structure.
Conditions: Perform work when existing and forecasted weather permits. Work should be performed safely and professionally and when ambient weather conditions are within the limits established by Britmet. LiteSlate should be stored in the original packaging in a storage facility where the temperature meets or exceeds 6°C. Use protective coverage overall pallets while being temporarily stored on-site. LiteSlate must be conditioned at a temperature no lower than 6°C for 24 hours before use. LiteSlate may be installed at temperatures as low as 0°C but must be hand fastened, the use of a pneumatic gun below 6°C will result in cracking and webbing in the fastened area. Be sure to follow the manufacturer’s installation requirements for all underlay or membrane and any other applications. Comply with all local building regulations.
Note of Caution: The slates can be slippery under certain conditions and job site safety procedures should be enforced
Fastener Recommendations: Slates should be applied using two (2) galvanised/ stainless steel or copper fasteners with a minimum 10mm diameter head and a minimum length of 30mm. Corrosion-resistant fasteners are always recommended, especially in coastal areas. The length of the Hip & Ridge fastener should be a minimum length of 50mm over the slates and 76mm over the ridge vent.
Note: Caution should always be used to ensure against over/under penetration of the fastener. Do not overdrive the fastener. The fastener head should be contacting the slate within the centre of the nailing target circle.
Spacing Between the Slates: 5mm spacer tabs are provided on every slate to aid in maintaining consistent spacing. The spacers will allow for any movement of the roof deck and expansion/ contraction of the slate.
Starter Course: A full slate can be cut into ¾ size to create an eave or starter slate for the starter course. Start ¾ Slate from left/ right of the centre line of the hip, ensure 50mm (max) into the gutter and spacing to suit 5mm taps. Using the full Slate, begin the first full course, align the centre of Slate directly over ¾ Slate to form a broken bond lap. To create the broken bond from course to course, use the centre mark provided on each slate and cut the slate lengthwise. This ensures that the nail holes are covered with the next course of slates and no through joints are exposed to the deck. Each slate shall be fastened with a minimum of two galvanised roofing fasteners. The fasteners must be a minimum of 30mm long and 3mm in diameter with a 10mm diameter head.
Laying Out ½ Slates or Cut Slates: When beginning or finishing with a cut piece of slate, the cut edge should be installed inward. The manufactured edge should be installed on the outside edge of the roof. This is to maintain an acceptable roof appearance along the gable edge of the roof. The centre mark of the slate can be used as a guide to cut ½-slates. This can also be used as a guide to keeping courses straight and to assist in maintaining the proper 5mm spacing when aligning with intermittent vertical chalk lines.
Note: Do not install slates smaller than 100mm
Felt and Batten Roof: The distance from the first-course batten to the second course batten, and beyond, is dependent on the roof pitch and subsequent exposure gauge settings. Please see the diagram of the LiteSlate, and the Pitch, Gauge, and Coverage table on the previous page. Ensure that the first course and eaves course are laid “broken bond” so that the joints do not line up and the weatherproofing integrity is maintained.
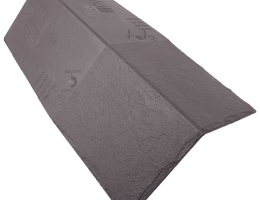
Ridge Cap Finishing: Easy Ridge Caps should be finished by cutting a standard LiteSlate at the end of the ridge into a triangle or diamond shape of the right size to cover the end gap. The resulting material should then be nailed in place into the end battens and/or truss. The material can be sealed by using a good quality silicone sealant.
Step Flashing: Step flashings are used over or under the roof coverings and are turned up on the vertical surface. Step flashings should extend under the uppermost row of the roof slate the full depth of the roof slate or at least 102mm over the roof slate immediately below the metal. The vertical leg of the metal should be turned up a minimum of 102mm and extend 102mm on the roof slate with a 19mm hem. Flashings should have a minimum length of 229mm and must overlap a minimum of 51mm.
Apron (Roof to Wall) Flashing: Lead apron flashing is used when a roof terminates to a wall causing a course to be cut and face nailed. It is installed over the slates and behind siding or counter/cap flashing or dressed into brickwork/stonework, etc.
Hip & Ridge Detail on a Boarded Roof: When pre-formed hip & ridge slates are used, place the nail at fastener guide targets. Fasten hip slates with 2 nails (one on each side). Maintain a (152mm) exposure.
Hip & Ridge Detail on a Felt & Batten Roof: Felt & batten roofs need the addition of extra tiling battens to secure the hip tiles.
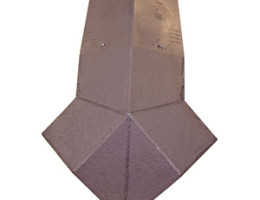
Ridge-to-Hip Intersection: When a ridge tile meets hip tiles, it is necessary to weatherproof this intersection. A lead saddle should be fitted to cover the intersection between the ridge tile and the mitred hip tiles. LiteSlate hip tiles cut easily without splintering or cracking.
Installation in Exceptionally High Wind Areas: There are certain areas, particularly on west-facing coasts and exposed islands, where wind speeds can exceed this level, and to reduce the risk of uplift. LiteSlates should be fixed directly to a solid substrate, such as sarking board, OSB or weather-grade ply. The maximum overlap – slates set at the 152mm gauge – should be used. Standard copper roofing rivets should be installed: a hole is drilled in the overlapping or top slate, and a rivet is slid up between the gap in the two bottom slates.
Pitch changes: LiteSlate can be installed onto roofs with two pitches, using a lead flashing.